The aim of this guide is to help you and your team add delivery documentation to your DivideBuy portal through a simple step-by-step instruction.
Adding delivery documents to your DivideBuy portal is quick and easy. Adding your delivery documents is very important part of us working together as this will ensure that you are paid. Always add your delivery documents as soon as you are able.
Step 1: Log into your Retailer Portal
Step 2: Select Orders – this will display all the orders within the portal sales grid
Step 3: Select Processing from the filter tab

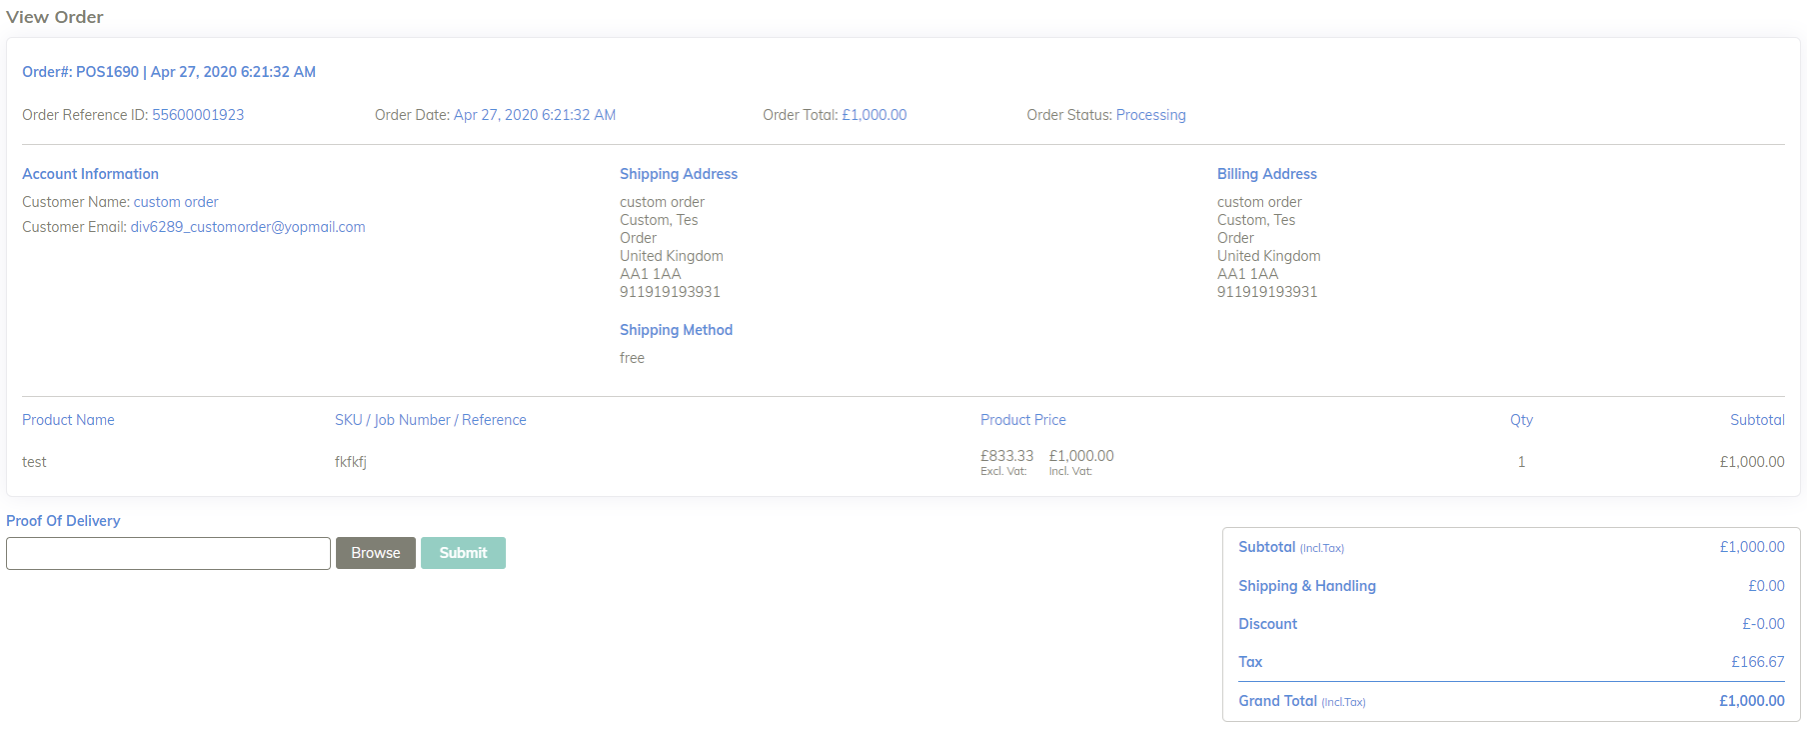
Step 4: Select the order which requires the Proof of Delivery

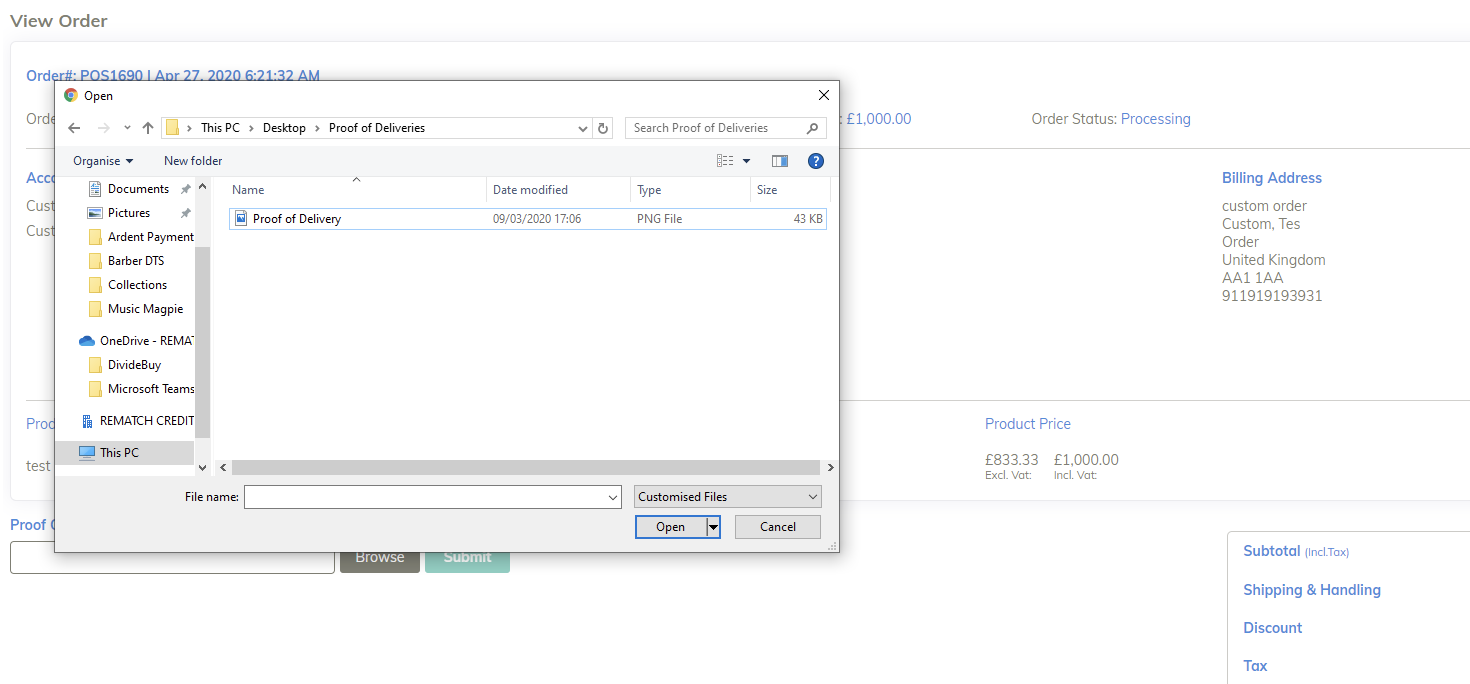
Step 5: Select Browse and upload a file to the order

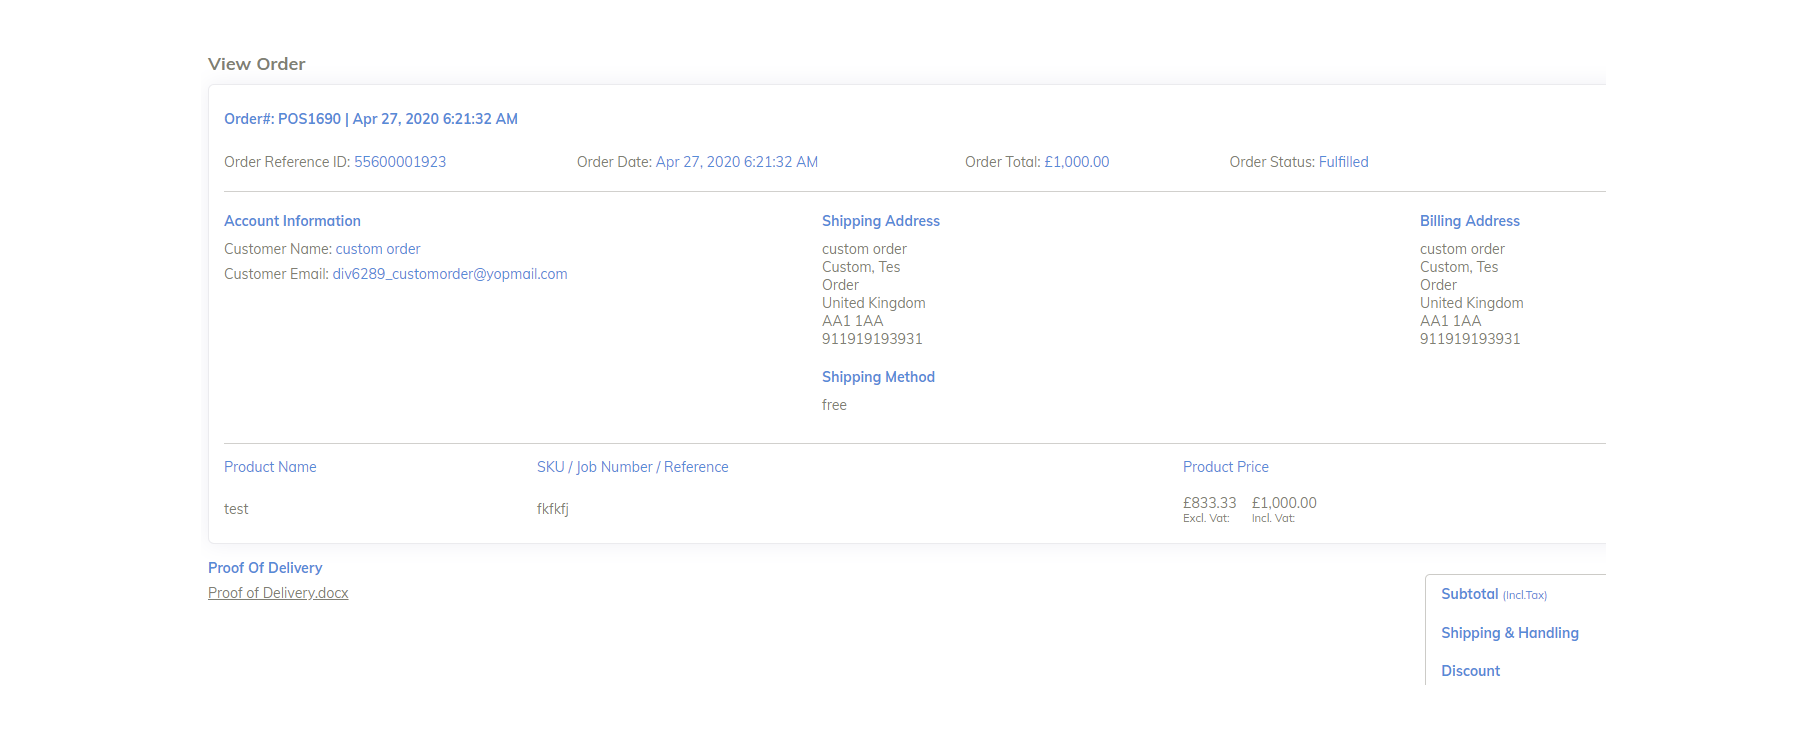
Step 6: Select Open – the title of the file will be added to the Proof of Delivery text box (Remember to one of the following formats: JPEG, PNG, PDF, doc, docx)
Step 7: Select Submit – your file will be uploaded and the Order Status will change to Fulfilled
