Installation Guide – Magento 2

Introduction

This page will outline how to install the DivideBuy module on to your Magento 2 store, along with the changes you will need to make in the DivideBuy configuration to get you up and trading as quickly as possible!

Step-by-Step Installation

The first step to adding DivideBuy as a Payment Method, is to install the Plugin itself. Below, we detail how to do this:

Step 1 – Install the DivideBuy Plugin

  • Copy and paste the DivideBuy folder from ‘app/code/’ to the ‘app/code/’ directory of your Magento 2 installation.
  • For Default DivideBuy Banner images, copy and paste the DivideBuy folder from ‘pub/media/’ to the ‘pub/media/’ directory of your Magento 2 installation.
  • Once you have completed the above, open a terminal session for your server, and navigate to the root directory of your Magento 2 Installation. Once there, run the following commands:
– php bin/magento deploy:mode:set developer
– php bin/magento deploy:mode:show
– php bin/magento cache:clean
– php bin/magento setup:upgrade
– php bin/magento setup:di:compile
– php bin/magento setup:static-content:deploy -f en_GB en_US
– php bin/magento cache:clean
– php bin/magento cache:flush

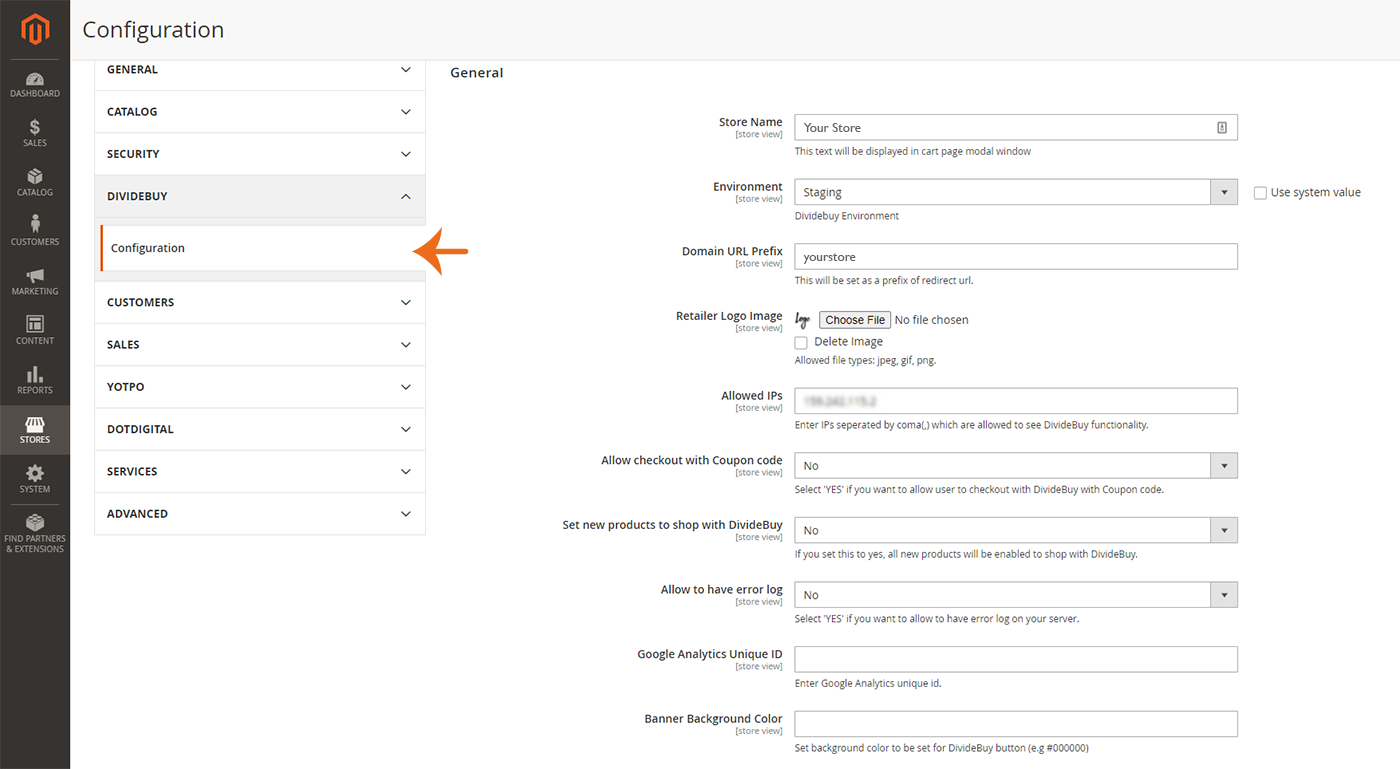
Step 2 – Enter the general configuration details

    • With the commands successfully run on the server, we can move on to configuring the DivideBuy module. To do this, begin by logging into your Magento 2 Admin Panel, then navigate to Stores>Configuration>DivideBuy>General (Note: Always make sure you are working on the appropriate Store View for your store). Once here, you will need set the following fields;

Store Name: The name of your store.

Token Number: The ‘Token Number’ provided to you by DivideBuy.

Authentication: The ‘Authentication Key’ provided to you by DivideBuy.

Environment:Production or Sandbox – This indicates whether the DivideBuy Payment Method should use the DivideBuy Sandbox Environment (for testing purposes) or the DivideBuy Production Environment (for Live/Day-to-Day operation).

Domain URL Prefix: Enter a string that identifies your store’s name. This will be used to generate the checkout instances for your customers. For example, if your store is called “My Great Bike Store”, we’d recommend entering the following; “mygreatbikestore” for this field.

Retailer Logo Image:The URL of where your Logo is stored (e.g. https://www.mycoolwebsite.com/my_logo.png).

Allowed IPs: If you only want DivideBuy to be visible to specific IP addresses, you can enter those IPs here. If you want DivideBuy to be visible to all users, leave this field blank.

    • Next, scroll further down the page until you see a section titled ‘Product’ and configure the ‘Enabled’ field; Select ‘Yes’ from the drop-down menu to enable the DivideBuy Convert+ tool on your product pages.

        • Now, scroll down to the next section, titled ‘Shopping Cart’, and configure the following fields;

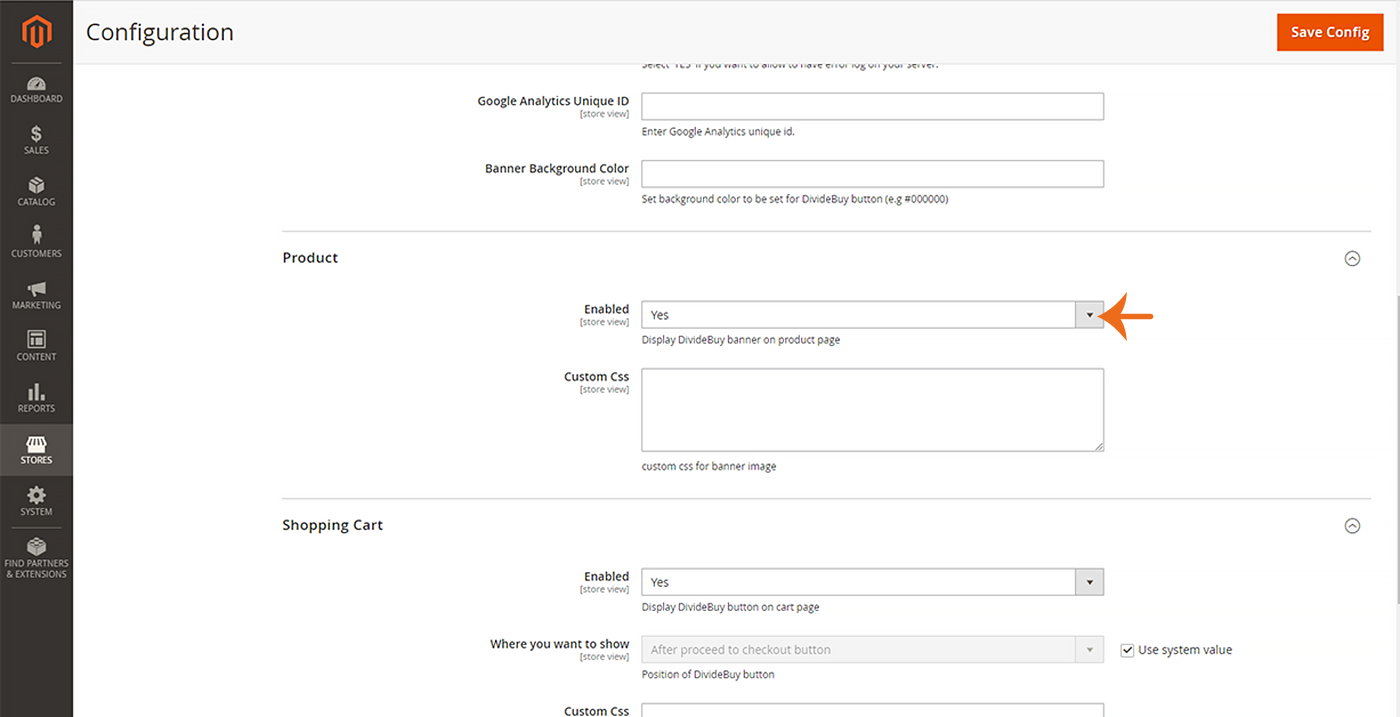
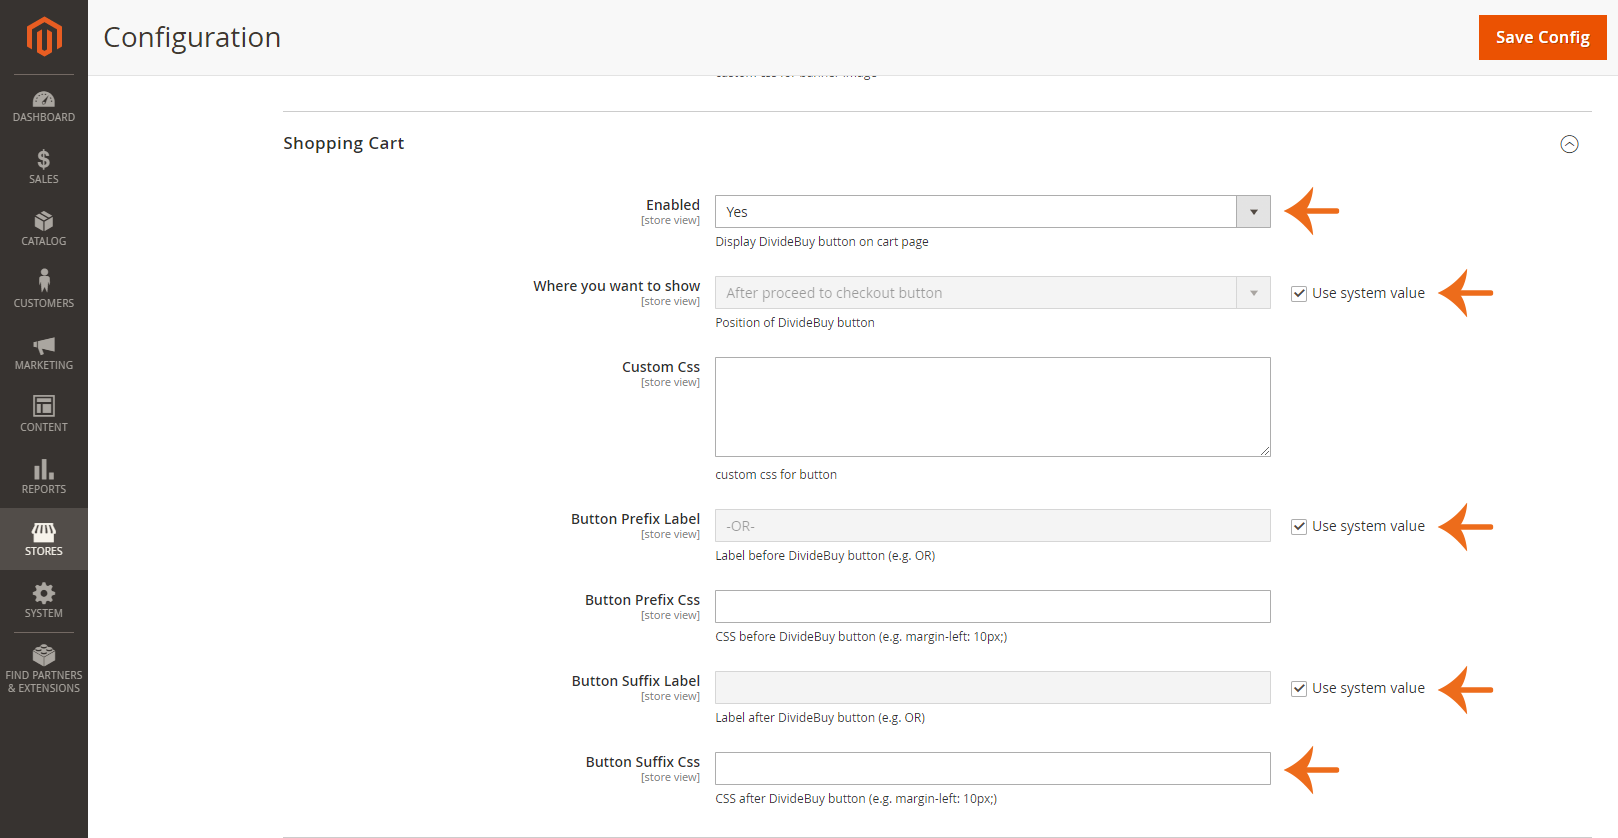
Enabled: Select ‘Yes’ from the drop down menu if you wish for the DivideBuy Quick Checkout Button to be displayed in your cart.

Where you want to show: Select if you would prefer the DivideBuy Quick Checkout Button to be inserted above/before or below/after your Default Magento 2 ‘Proceed to Checkout’ button.

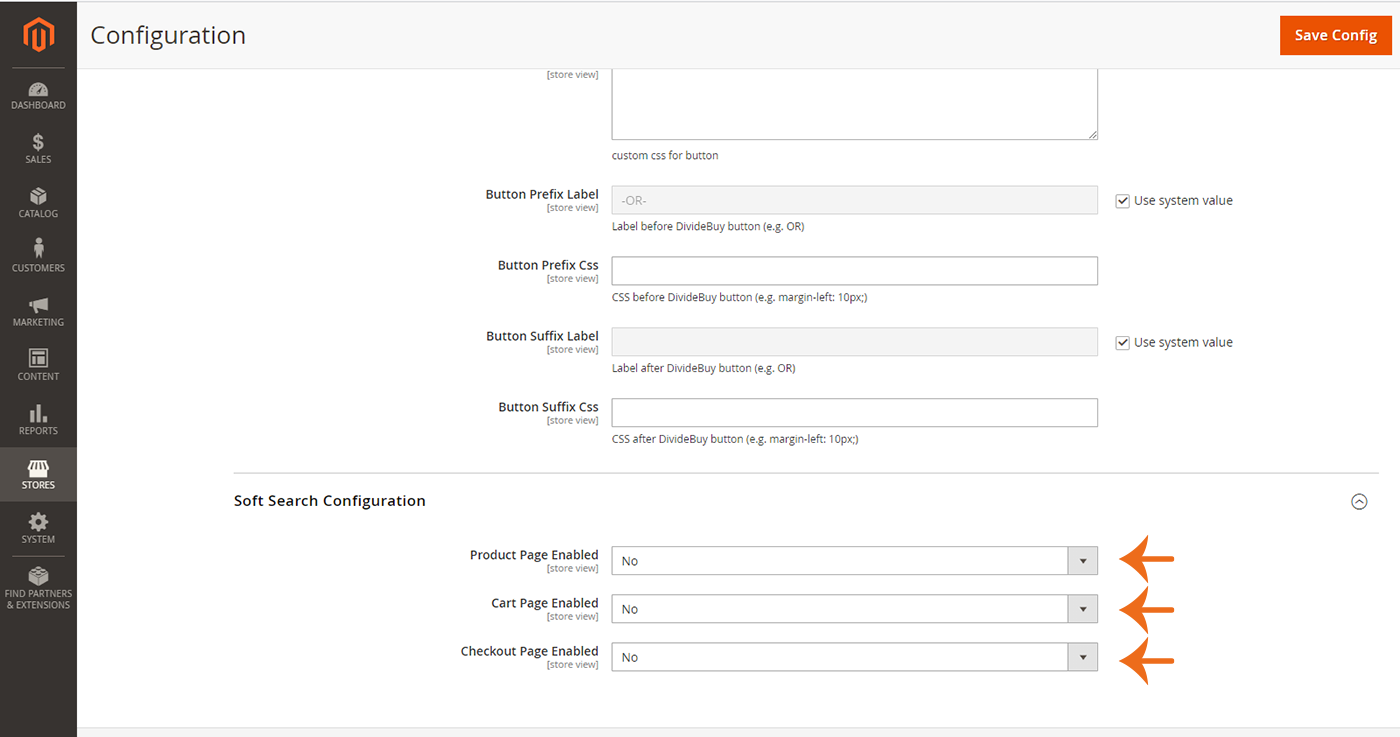
Button Prefix Label:If you display the DivideBuy Quick Checkout Button after your Proceed to checkout’ button, enter any text here that you would like to be added above it. By Default, we recommend ‘-OR-‘.

Button Prefix CSS: Enter any CSS here that you would like to apply to the DivideBuy Button Prefix.

Button Suffix Label:If you display the DivideBuy Quick Checkout Button before your Proceed to checkout’ button, enter any text here that you would like to be added below it. By Default, we recommend ‘-OR-‘.

Button Suffix CSS: Enter any CSS here that you would like to apply to the DivideBuy Button Suffix.

        • Finally, scroll down to the ‘Soft Search Configuration’ section. Here, with the three provided drop-down menus, you can select each location where you’d like the DivideBuy Soft Search to be displayed.

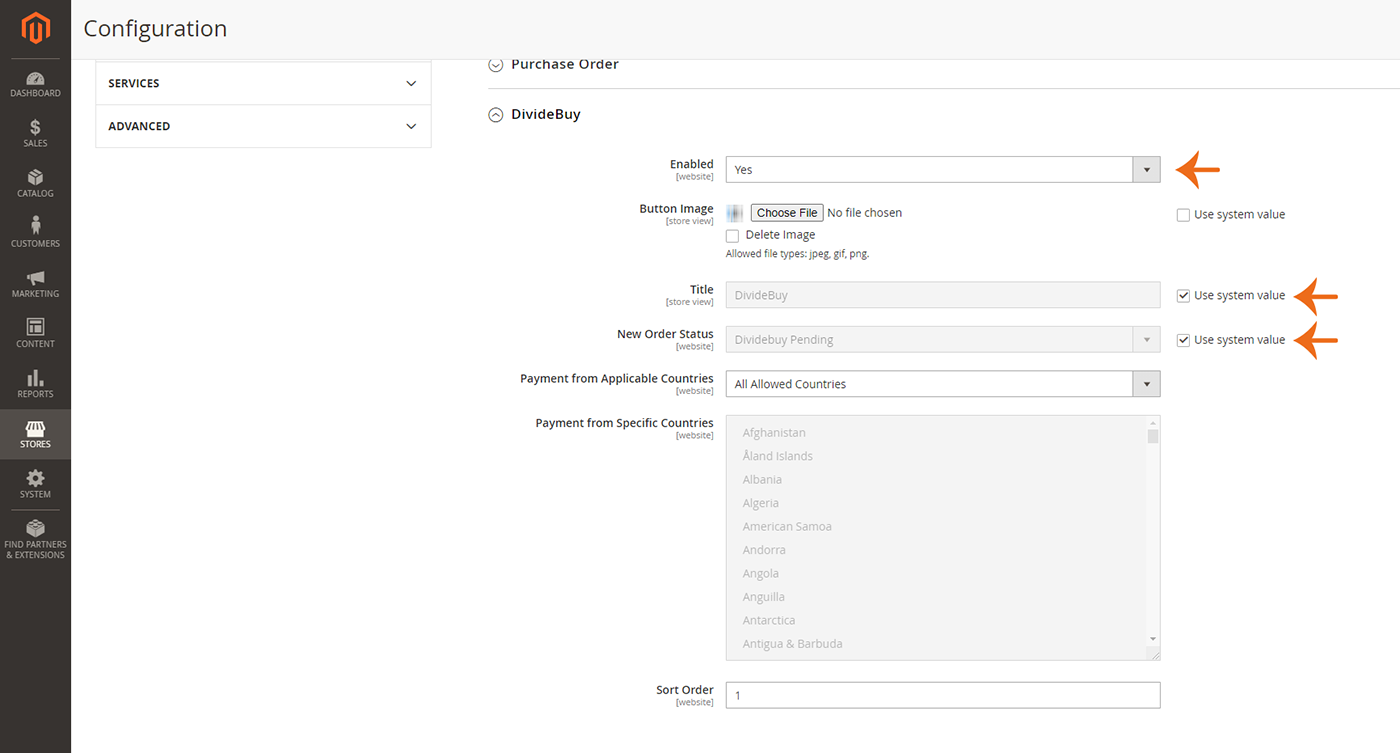
Step 3 – Enabling/Disabling DivideBuy Payments

        • Next, you will need to enable the DivideBuy Payment Method in your checkout. To do this, navigate to Stores>Configuration>Sales>PaymentMethods>OtherPaymentMethods>DivideBuy and under ‘Enabled’, change the value to ‘Yes’ to display the DivideBuy Payment Method in your checkout.

      • Under ‘Title’, enter the name that you would like to be displayed for the DivideBuy Payment Method (i.e. ‘DivideBuy’ or ‘Interest Free Credit – DivideBuy’).
      • For ‘New Order Status’, select the status that you would like to be applied to new DivideBuy orders in your sales grid from those available in the drop-down menu.

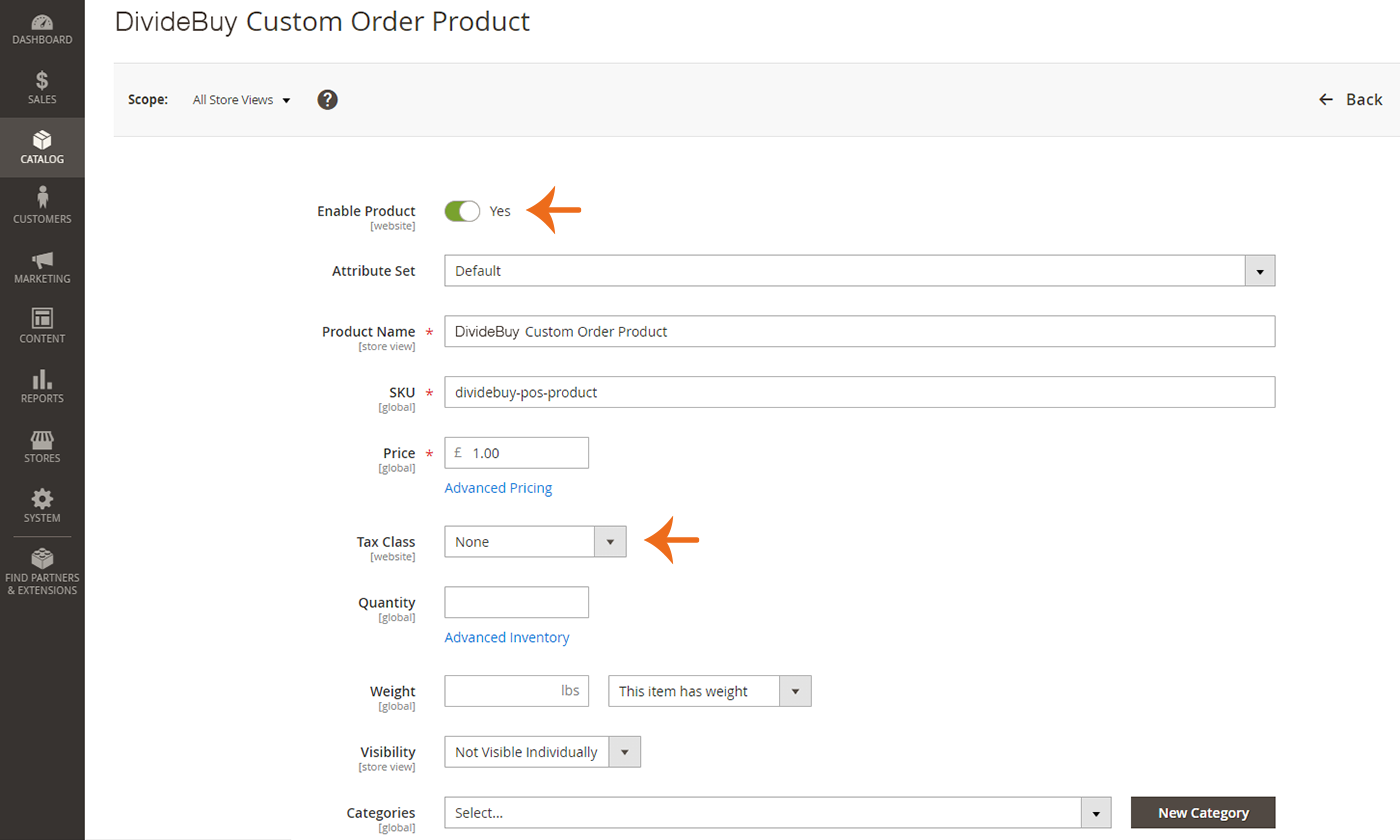
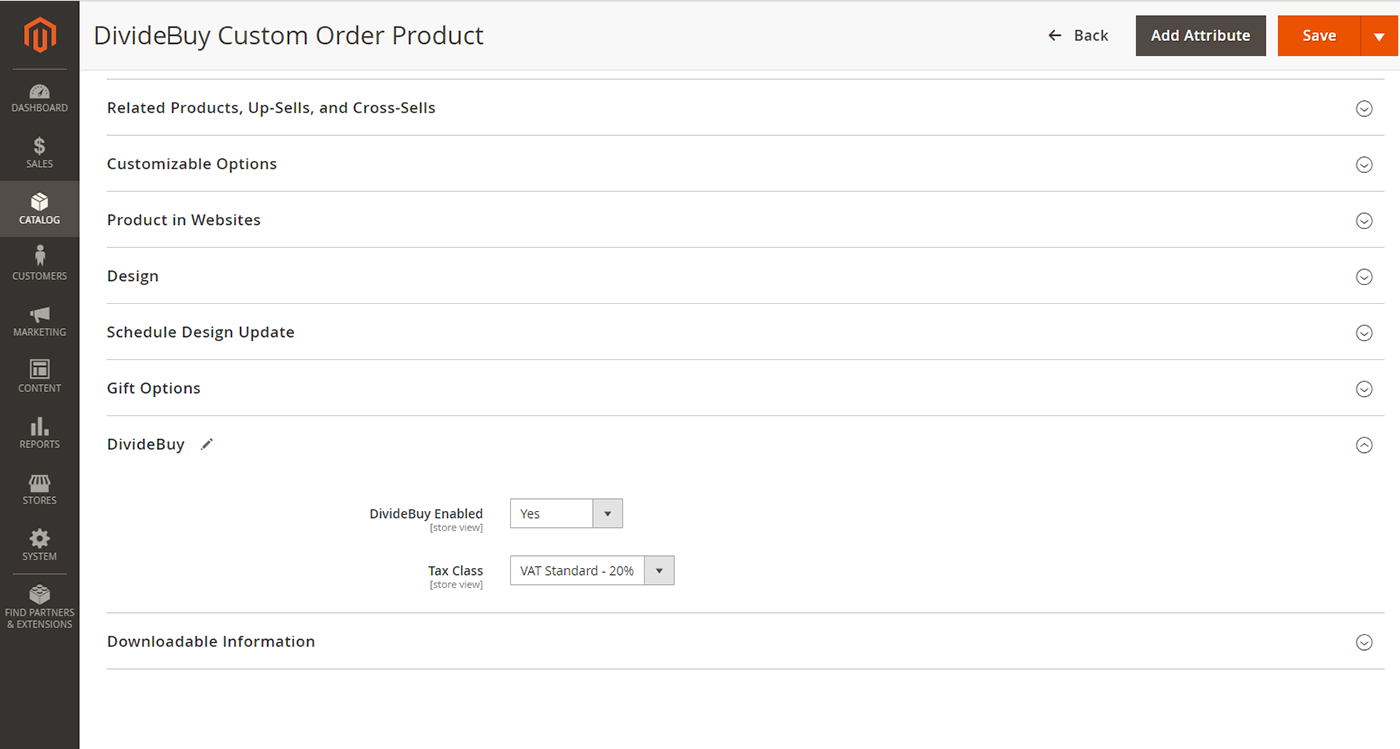
Step 4 – Enabling Products to be available with DivideBuy

        • To enable a product to be available with DivideBuy, in your Magento 2 Admin Panel, navigate to Catalog>Products and click ‘Edit’ on the product you wish to enable.

        • With the product editing page open, scroll down the page until you find the ‘DivideBuy’ settings header. Click to open it.
        • Under ‘DivideBuy Enabled’, select ‘Yes’ from the drop-down list. Then, under ‘Tax Class’, select the appropriate VAT Rate for your product from the drop-down list.

The above guide provides you with all the steps you will need to take to get DivideBuy up and running on your Magento 2 store.

Was this page helpful?

Page last updated: 20 June 2022
Skip to content